Knowing where to hatch, feed, and hunt turns the Bug Evolution map guide from a list of regions into a usable route plan. This breakdown connects every spawn area with its food density and safer passages so you can travel with purpose.
Bug Evolution Map Guide: Regions, Routes, and Resources
Bug Evolution map guide knowledge reveals where food, safer routes, and productive hunting grounds sit across the current open world. This matters because a well-planned route lets new spiders grow steadily instead of wandering through empty terrain, while experienced players can reach richer food crossings without wasting time.
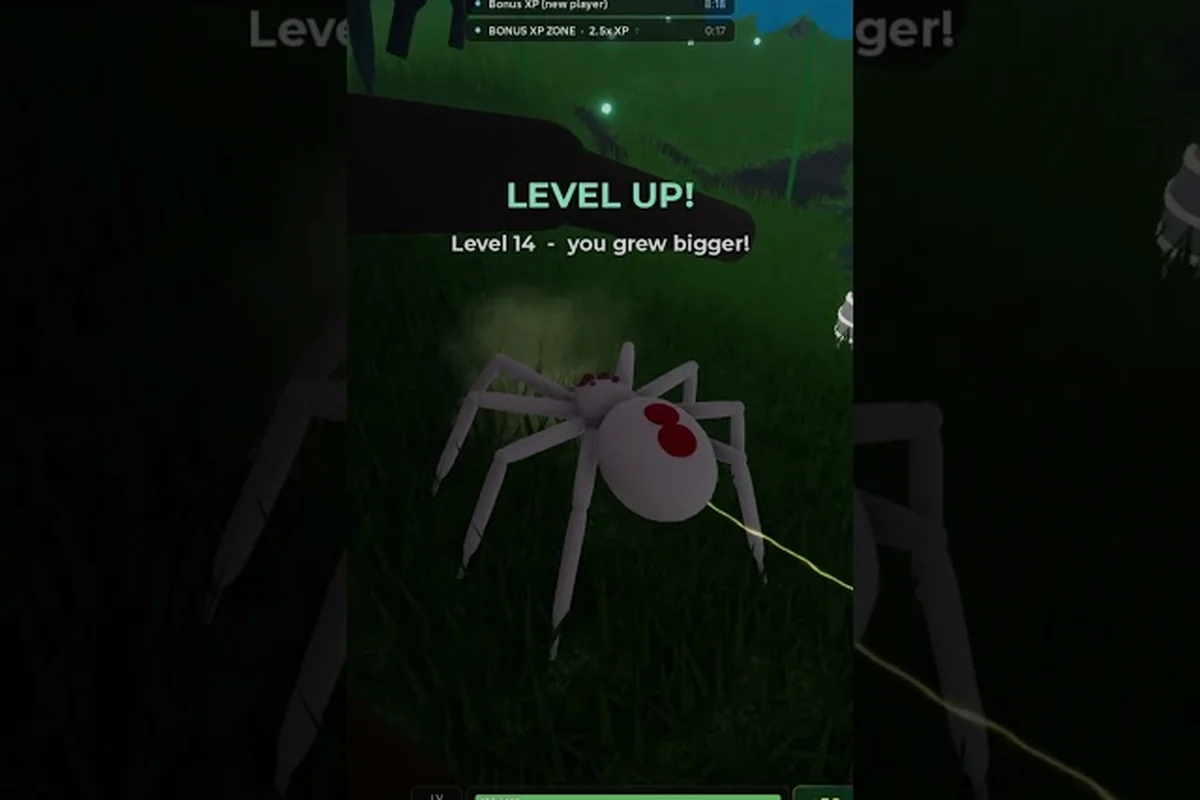
The bug evolution map video provides a visual walkthrough of the current open world, making it easier to connect each bug evolution spawn area with nearby food locations and productive hunting grounds. Watching the map alongside the guide helps identify safer routes between feeding zones, plan where a spider can grow after a successful hunt, and compare secluded spawn points with busier hunting spots without relying on trial-and-error navigation.
Spawn Area and Early-Game Food Locations
The starter grass fields are the most reliable starting point for a new insect because they combine dense basic food with lower-risk early encounters. Players hatch near this area, and it also serves as a respawn location after defeat, so learning its layout gives you a dependable recovery point. The surrounding routes connect the starter fields to the open field, hills, and castle landmark.
Community experience suggests beginning with the base spider form, eating continuously, and using the nearby food rather than immediately chasing distant targets. This lets you understand movement, the hunger bar, and the evolution interface before stronger insects appear. The map is compact enough to cross quickly, but food density changes by region, so the best route is not always the straightest one.
Beginner Route From the Grass Fields
The starter route is simple: hatch in the grass, eat until the first evolution is available, then move outward along the edge of the field rather than crossing the entire open area. This produces a dependable early-game circuit because food and escape routes remain close together.
| Route segment | Main purpose | Beginner priority |
|---|---|---|
| Starter grass fields | Hatching, basic food, learning controls | Very high |
| Field edge | Mixed food and first prey encounters | High |
| Hill approach | Mid-tier food and directional hunting | Medium |
| Castle surroundings | Cover, orientation, and group movement | Medium |
| Desert region | Specialist travel and future boss content | Lower at first |
These locations can be compared with the broader map and spawn-point overview, which explains why the starter fields make such a natural opening hub. For example, a hatchling can stay within the grass-field edge for basic food and early prey encounters, then use the hill approach as a mid-tier hunting zone once its first evolution is available. This gradual expansion keeps movement between the bug evolution spawn area, food locations, and escape routes manageable instead of sending new players straight toward specialist regions or future boss areas.
Managing the First Ten Minutes
Food is the immediate priority in the bug evolution spawn area. Eat small food sources while moving instead of stopping to wait for a perfect target, because growth depends more on maintaining nutrition than finding one large meal. As a basic spider, your strongest assets are speed, cover, and access to abundant food.
A reliable sequence begins in the Bug Tree spawn area, where you should combine immediate food intake with a quick assessment of nearby grass coverage before moving deeper into the map. For example, hatch near several small food sources, take one bite while repositioning, and only cross exposed ground when your nutrition is already stable. This reduces early risk in the hunting grounds and gives you enough resource to reach LV 1 without losing time to recovery.
-
Eat immediately after hatching and scan nearby grass.
-
Reach LV 1 without spending time on a distant fight.
-
Collect enough food for the next upgrade while staying near the field edge.
-
Progress toward LV 10 and the spider form.
-
Spend coins on Bite Damage and Bite Speed once those upgrades become available.
-
Expand the route toward the open field and hills.
The first-hour loop reported by players is hatching, eating, evolving through the Bug Tree, and improving bite stats. If you need more detail on converting a reliable food supply into steady growth, the food-farming progression guide explains how each part of that loop supports the next.
Grass Fields and Food-Rich Hunting Grounds
The grass biome is the current map’s most dependable food source, especially for players still working through early evolution. Food appears scattered across the field rather than in one fixed chest, so the best technique is to sweep in arcs while watching for prey and stronger insects. This makes the field useful both as a feeding zone and as a hunting area when movement becomes more aggressive.
Players searching for bug evolution food locations should compare availability rather than assuming that every visible item lasts equally long. Smaller food is more accessible early, while richer drops may appear near contested crossings. Since Bug Evolution is a new 2026 release, exact spawn rates can change with updates, so community observations should be treated as a current snapshot rather than a permanent rule.
Comparing the Main Food Zones
| Area | Food availability | Competition | Best use | Main risk |
|---|---|---|---|---|
| Grass fields near spawn | Dense starter food | Low to moderate | Early growth and respawn recovery | Larger predators entering the field |
| Field edge | Strong mixed supply | Moderate | Reliable hunting and evolution | Exposure in open terrain |
| Hills approach | Mid-tier feeding opportunities | Moderate to high | Better combat opportunities | Difficult retreat routes |
| Castle surroundings | Concentrated mid-tier food | Moderate | Team movement and navigation | Ambushes near cover |
| Desert region | More specialized travel target | Variable | Exploration and future boss preparation | Harsh terrain and limited cover |
The strongest choices for bug evolution best hunting spots are dense-food crossings, not isolated corners. The grass-field edge, the point where the hills begin, and the castle approach all concentrate activity because players using different food sources must pass through them.
Why Crossings Beat Empty Land
Empty terrain may look safer, but it usually provides little food and forces long returns to populated areas. A crossing gives you several advantages at once: nearby prey, possible drops from stronger insects, and multiple escape angles. The field-edge crossing is especially useful because it combines early-game accessibility with enough activity to support a mid-game hunt.
Teams can divide responsibilities naturally. One player eats while another patrols the route, or a pair can cover opposite sides of a hill approach before rotating toward the castle. Solo players should favor crossings that allow a quick retreat into tall grass rather than committing to an exposed pursuit.
Best Hunting Spots and Safe Rotation Routes
The castle is the clearest landmark on the current open map. Its stone walls provide cover and make it easier for teams to regroup, while its position near several food routes offers a practical middle point between the starter region and the outer terrain. Because there is no full map overlay in the current build, recognizable landmarks matter when planning a route.
A solo insect should use the castle differently. Rather than staying close to the structure, treat it as a reference point and rotate between the nearby approach and food-bearing terrain. This reduces downtime while preserving a reliable way back toward familiar ground. If you are also tracking unusual prey, the guide to strong and rare insects adds useful context for deciding whether a target is worth chasing.
Hunting Priority by Game Stage
| Situation | Preferred spot | Rotation | Reason |
|---|---|---|---|
| First spawn or respawn | Starter grass fields | Small loops around nearby patches | Food is dense and travel risk is low |
| Early growth | Grass-to-hill crossing | Field edge, then retreat | Combines feeding with modest combat |
| Mid-game evolution | Castle approach | Between castle and hill lines | Adds cover and stronger prey activity |
| Team hunting | Castle surroundings | Cover one side, rotate together | Keeps teammates near a landmark |
| Open-world scouting | Desert boundary | Short trips from safer routes | Tests new routes without a long commitment |
For bug evolution hunting grounds, prioritize access to food over distant spectacle. A location becomes productive when it offers a repeat path, enough cover, and a nearby retreat. The castle approach meets all three conditions better than an exposed desert trip, especially during a busy server.
Rotating Instead of Farming One Spot
Standing in one place works briefly, but repeated routes reduce the time spent traveling. Rotate between the field edge, hills, and castle while maintaining a general direction. This pattern keeps food coming and prevents other insects from learning your exact position.
Movement should also vary. Alternate between wide arcs that cover scattered food and shorter side-to-side passes near contested terrain. When combat starts, continue moving until the advantage is clear rather than relying on a static exchange. A player with improved bite stats can take more risks, but that does not make every distant target efficient.
Desert Region, Hills, and Upcoming Map Changes
The desert region is a confirmed part of the current map, although it is less useful than the grass biome for a first evolution. Its associated Desert Sand Worm boss content is tied to the November 9 update, but detailed encounter information is not yet verified. Treat the desert as an expansion route and prepare for future content rather than assuming a boss is already available there.
The hills are more immediately useful. They connect the field system to the castle, contain mid-tier food opportunities, and create natural sightlines for spotting movement. Their uneven ground can interrupt attacks, yet they also make long chases riskier for small insects. For that reason, the best route is to feed near the lower approach and attack only when a target comes within a manageable distance.
Verified Regions Versus Future Content
| Location or feature | Status on October 30, 2026 | Practical use |
|---|---|---|
| Grass fields | Available now | Best beginner feeding zone |
| Open field | Available now | Flexible hunting and rotation space |
| Hills | Available now | Mid-tier hunting and route connection |
| Stone castle | Available now | Landmark, cover, and team regrouping point |
| Desert | Available now | Exploration and pre-boss preparation |
| Underground cave | Announced for November 19 | Not yet part of the open build |
Players asking about bug evolution where to spawn should understand that the current safest answer remains the grass-field starter region. The desert is an exploration option, not a substitute for the starter area. Similarly, no underground cave exists in the open map as of this guide’s October 30, 2026 snapshot, so planning around it would be misleading. The new-map overview separates confirmed terrain from the upcoming cave update.
Watching the Desert Update
The November 9 update is expected to connect the desert more directly with boss-oriented play. Before that update, use the region to learn its exits, identify nearby prey, and compare travel time from the castle. After a patch, verify food density, boss access, and escape routes again because updates can alter spawn distributions and movement balance.
For teams, the desert works best as a planned destination rather than a random detour. Agree on a meeting landmark, enter from the same side, and avoid splitting across the region. A structured rotation protects the group from losing time and gives everyone a clear route back toward the food-rich interior.
Route Planning for Solo and Team Play
Good route planning turns the bug evolution map guide into a repeatable farming loop instead of a vague search for insects. Start with the nearest food source, set a boundary based on your current form, and only expand the route after your growth slows. This prevents early players from crossing the map for a marginal food gain while their hunger bar remains low.
For solo play, short loops around the grass fields are the safest opening. As the spider form unlocks, shift toward the field edge, then the hills. Keep the castle as a fallback landmark. This progression follows the map’s food distribution and reduces the distance between a successful hunt and the next meal.
| Player situation | Best route | Recommended stop |
|---|---|---|
| Newly hatched | Tight starter-field loops | Begin after a few bites |
| Early spider | Grass fields to field edge | Feed before engaging prey |
| Mid-game insect | Field edge, hills, castle | Rotate every short session |
| Desert specialist | Castle or hills to desert edge | Return before resources run low |
| Team run | Castle-centered rotation | Regroup at the landmark |
Teams should exploit the castle as a central anchor instead of spreading across the entire map. A two-player team can cover a field-to-hill route, while three or four players can alternate between food collection and perimeter scouting. If damage upgrades are part of your plan, the bite-damage and upgrade guide explains which stats affect your ability to secure contested prey.
The Practical One-Hour Loop
The most reliable first session follows a simple sequence: hatch in the starter grass, eat enough for the LV 1 fly or base stage, continue toward LV 10, evolve into the spider form, purchase Bite Damage and Bite Speed, and then widen the route into the open field. This sequence supports both growth and map learning.
Keep the loop flexible after the first evolution. If a hunting route produces little food, return to the grass. If teams are controlling the castle approach, take that route only after your hunger is stable. If a rare insect appears outside the planned circuit, assess the chase cost before abandoning the food supply.
Frequently Asked Questions
Where should new players spawn in Bug Evolution?
New players should use the starter grass fields, which combine dense beginner food with a safer learning environment. The area also functions as a respawn point after defeat, making it useful beyond the first hatch. Eat there until your first meaningful evolution, then rotate toward the field edge instead of crossing the map immediately.
What are the best Bug Evolution hunting spots?
The strongest hunting spots are dense-food crossings around the grass-field edge, the hill approach, and the castle surroundings. These locations combine prey with multiple escape routes, while the castle adds useful cover and orientation. Avoid empty open terrain unless your current insect form is strong enough to chase targets across a long distance.
Where can players find the most food in Bug Evolution?
The grass biome currently provides the most dependable food, especially near the starter area. Players looking for bug evolution food locations should sweep the fields in arcs, collect smaller sources continuously, and save longer hunts for the field edge or hill approach. Food distribution can change after updates, so verify the current layout after major patches.
Is the underground cave available yet?
No. The underground cave was announced for November 19 and is not part of the open world as of October 30, 2026. The confirmed playable regions include grass fields, an open field, hills, a stone castle, and a desert. Players should use the existing castle and hill routes while waiting for the cave update.
Should solo players use the castle or desert first?
Solo players should generally prioritize the castle approach because it combines mid-tier food, cover, and a recognizable return point. The desert is more useful for scouting or preparing for the announced Sand Worm update. Once your insect has enough combat strength and you know the desert exits, a short desert trip can become part of your rotation.